
Projectors have become indispensable tools in various settings, from classrooms and boardrooms to home theaters and outdoor events. Understanding how projectors work is essential for anyone looking to make the most of these devices.
In this article, we’ll take you on a journey through the fascinating world of projectors, exploring how they function, the different types available, and practical tips for choosing the right one for your needs. By the end, you’ll have a deeper understanding of how projectors bring images and videos to life, empowering you to make informed decisions and get the most out of your projector experience. So, let’s dive in and discover the magic behind these versatile devices!
Have you ever wondered how projectors magically transform images and videos onto a big screen?
From classrooms to boardrooms, projectors play a crucial role in delivering captivating presentations and immersive entertainment experiences. But how exactly do they work? Our guide breaks down the complex technology behind projectors into easy-to-understand concepts, ensuring that you grasp the fundamentals with ease.
Imagine confidently choosing the perfect projector for your home theater setup or business presentations. With our comprehensive guide, you’ll gain the knowledge and insight needed to make informed decisions and unleash the full potential of your projector.
Let’s delve into the inner workings of projectors and unlock a world of possibilities. Don’t miss out – keep reading!
Did you know?
- The earliest known projector was created in 17th-century Germany by Johann Zahn. It used a combination of lenses and mirrors to project images onto walls and ceilings!
- According to Fact.MR, the interactive projector market is projected to reach $20.9 bn by 2032 from $3.4 in 2021.
What is a Projector?
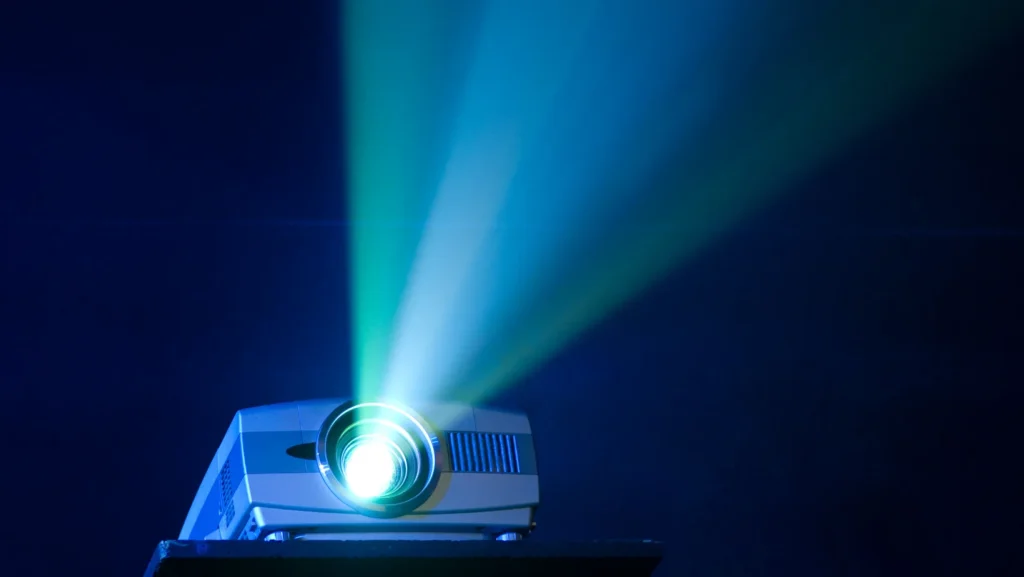
A projector is a device that projects images, videos, or presentations onto a surface, typically a screen or wall, for viewing by an audience. It works by using light sources to illuminate an image or video onto a surface, magnifying it to a larger size.
Projectors are commonly used in classrooms, boardrooms, theaters, and homes for various purposes such as presentations, entertainment, and educational activities. They come in different types, including digital projectors, overhead projectors, and slide projectors, each with its own set of features and capabilities.
Components of a Projector
The components of a projector typically include:
- Light Source: This is the primary component that emits light to create the image. Common light sources include lamps, LEDs, and lasers.
- Lens System: The lens system focuses and projects the light onto the screen. It consists of multiple lenses that adjust the size, shape, and clarity of the projected image.
- Imaging Technology: Projectors use various imaging technologies to create the visual content, such as Digital Light Processing (DLP), Liquid Crystal Display (LCD), or Liquid Crystal on Silicon (LCOS).
- Color Wheel (for DLP projectors): In DLP projectors, a color wheel containing red, green, and blue filters spins rapidly to produce full-color images.
- Cooling System: Projectors generate heat during operation, so they are equipped with cooling systems, such as fans or heat sinks, to prevent overheating.
- Power Supply: The power supply provides electrical power to the projector’s components, including the light source and electronics.
- Control Panel: Most projectors feature a control panel or remote control for adjusting settings such as brightness, contrast, and input sources.
- Input/Output Ports: These ports allow connection to external devices such as computers, DVD players, gaming consoles, and audio systems.
- Housing/Enclosure: The projector’s housing encloses and protects its internal components, providing a framework for mounting and positioning the device.
Understanding these components is essential for selecting the right projector for your needs and ensuring optimal performance.
Light Source and Projection Technology
Light Source and Projection Technology are two critical components of a projector that work together to create vivid and immersive images.
Here’s a breakdown of each:
Light Source:
- The light source is the fundamental element responsible for generating the brightness needed to project images onto a screen.
- Traditional projectors commonly use lamps, which produce light through the heating of a filament. However, newer models increasingly employ light-emitting diodes (LEDs) or laser diodes for their longer lifespan, lower power consumption, and quicker startup times.
- LED-based projectors offer energy efficiency, durability, and a wider color gamut, while laser projectors deliver even higher brightness levels, better contrast ratios, and virtually maintenance-free operation.
- The choice of a light source depends on factors such as budget, intended usage, and environmental considerations.
Projection Technology:
Projection technology determines how images are created and displayed on the screen.
Common projection technologies include:
- Digital Light Processing (DLP): DLP projectors use a chip with microscopic mirrors to reflect light onto the screen. They offer high contrast ratios, fast response times, and minimal pixelation.
- Liquid Crystal Display (LCD): LCD projectors pass light through liquid crystal panels to create images. They typically produce vibrant colors, and sharp images, and are often more affordable than DLP projectors.
- Liquid Crystal on Silicon (LCOS): LCOS projectors combine the benefits of DLP and LCD technologies, offering high resolution, excellent color accuracy, and minimal screen door effects.
Each projection technology has advantages and drawbacks, making it essential to consider factors such as image quality, resolution, and budget when choosing a projector.
Understanding the interplay between the light source and projection technology is crucial for selecting the right projector that meets your needs, whether for home entertainment, business presentations, or educational purposes.
Understanding Resolution and Aspect Ratio

Understanding Resolution and Aspect Ratio is essential when it comes to selecting a projector that meets your display requirements.
Here’s a breakdown of each:
Resolution:
Resolution refers to the number of pixels displayed on the screen horizontally and vertically. It determines the clarity and level of detail in the projected images.
Common projector resolutions include:
- SVGA (800 x 600 pixels): Suitable for basic presentations and viewing standard-definition content.
- XGA (1024 x 768 pixels): Provides sharper images and better compatibility with laptops and other devices.
- WXGA (1280 x 800 pixels): Offers widescreen format for viewing HD content and presentations.
- Full HD (1920 x 1080 pixels): Delivers high-definition resolution with exceptional clarity and detail.
- 4K Ultra HD (3840 x 2160 pixels or higher): Provides incredibly sharp and detailed images suitable for professional use and home theater applications.
The choice of resolution depends on factors such as the intended use of the projector, the size of the screen, and the quality of the content being displayed.
Aspect Ratio:
Aspect ratio refers to the proportional relationship between the width and height of the projected image.
Common aspect ratios for projectors include:
- 4:3 (Standard): Traditional aspect ratio suitable for presentations, business applications, and older content formats.
- 16:9 (Widescreen): Widescreen format is ideal for watching movies, gaming, and viewing HD content.
- 16:10 (Widescreen): Similar to 16:9 but provides slightly more vertical screen space, commonly used in business and educational settings.
Choosing the right aspect ratio depends on the content you’ll be displaying and the compatibility with your screen or projection surface.
Understanding resolution and aspect ratio ensures that you select a projector that delivers the desired image quality and aspect ratio for your specific needs, whether it’s for business presentations, home entertainment, or educational purposes.
Projection Surfaces and Screen Size
Understanding Projection Surfaces and Screen Size is crucial for optimizing the viewing experience when using a projector.
Projection Surfaces:
Projection surfaces are the mediums onto which the projector projects images. They play a significant role in determining the quality and clarity of the projected image. Common projection surface options include white walls, projector screens, painted walls, and ambient light-rejecting (ALR) screens. Each type offers different levels of image brightness, contrast, and color accuracy. Factors such as ambient light conditions, viewing angle, screen size, and budget should be considered when selecting a projection surface.
Screen Size:
Screen size refers to the diagonal measurement of the projected image and is typically measured in inches. The optimal screen size depends on various factors such as the projector’s throw distance, room size, seating arrangement, and the audience’s viewing preferences. It’s essential to balance screen size with viewing distance to ensure comfortable viewing without straining the eyes. Additionally, considering the projector’s throw ratio helps determine the distance required between the projector and the screen to achieve the desired image size.
Understanding how projection surfaces and screen size impact the viewing experience allows users to create immersive and enjoyable environments for presentations, home theaters, gaming, and other applications. By choosing the right projection surface and screen size, users can optimize image quality and maximize the visual impact of their projector systems.
Lens and Focus Mechanism
The lens and focus mechanism are integral components of a projector, responsible for shaping and sharpening the projected image.
Lens:
The lens is the optical component that directs and focuses light onto the projection surface. It determines the size, clarity, and sharpness of the projected image. Projectors may feature various types of lenses, including fixed focal length lenses and zoom lenses.
Zoom lenses allow users to adjust the size of the projected image without physically moving the projector, offering flexibility in different environments and setups. Additionally, high-quality lenses with advanced coatings help minimize distortion, aberrations, and light loss, resulting in crisp and vibrant images.
Focus Mechanism:
The focus mechanism enables users to adjust the sharpness and clarity of the projected image by precisely controlling the focal length of the lens. It allows for fine-tuning the focus to ensure that text, graphics, and multimedia content appear clear and detailed.
Most projectors feature manual focus controls, typically located on the projector or the remote control, allowing users to adjust the focus easily. Some advanced projectors may also offer automatic focus adjustment capabilities, where the projector analyzes the image and adjusts the focus automatically for optimal clarity.
Understanding the lens and focus mechanism is essential for achieving the desired image quality and sharpness when using a projector. By selecting the appropriate lens type and mastering the focus adjustment, users can ensure that their projected content is sharp, clear, and visually engaging.
Keystone Correction and Image Adjustment

Keystone correction and image adjustment are essential features of projectors that help optimize the quality and alignment of the projected image, especially when the projector is not perfectly aligned with the projection surface.
Here’s an explanation highlighting key points:
Digital Keystone Correction:
Many modern projectors offer digital keystone correction, allowing users to adjust the shape of the projected image vertically (vertical keystone correction) or horizontally (horizontal keystone correction). This adjustment can typically be made manually through the projector’s menu settings or automatically using built-in sensors that detect the projector’s angle.
Manual Keystone Adjustment:
Some projectors feature manual keystone adjustment controls, which allow users to physically tilt the projector lens to correct the image distortion. This manual adjustment is typically available for both vertical and horizontal keystone correction and may involve rotating or sliding mechanisms on the projector.
Keystone Correction Range:
Projectors vary in their keystone correction range, with some offering a wider adjustment range than others. A larger correction range provides greater flexibility in positioning the projector and allows for the correction of more extreme angles or distortions.
Image Adjustment Settings:
In addition to keystone correction, projectors often include other image adjustment settings such as aspect ratio adjustment, zoom, and focus controls. These settings allow users to fine-tune the size, shape, and clarity of the projected image to suit their preferences and the characteristics of the viewing environment.
Importance of Keystone Correction:
Proper keystone correction is crucial for ensuring that the projected image appears uniform, proportional, and distortion-free, regardless of the projector’s placement. It helps maintain image quality and readability, making it easier for viewers to engage with the content being presented.
Keystone correction and image adjustment features enhance the versatility and usability of projectors, allowing users to achieve optimal image quality and alignment in various environments and setups. Understanding how to use these features effectively can significantly improve the viewing experience and ensure that projected content is displayed accurately and professionally.
Connecting and Setting Up a Projector
Connecting and setting up a projector involves several steps to ensure a successful projection experience.
Here’s a brief overview:
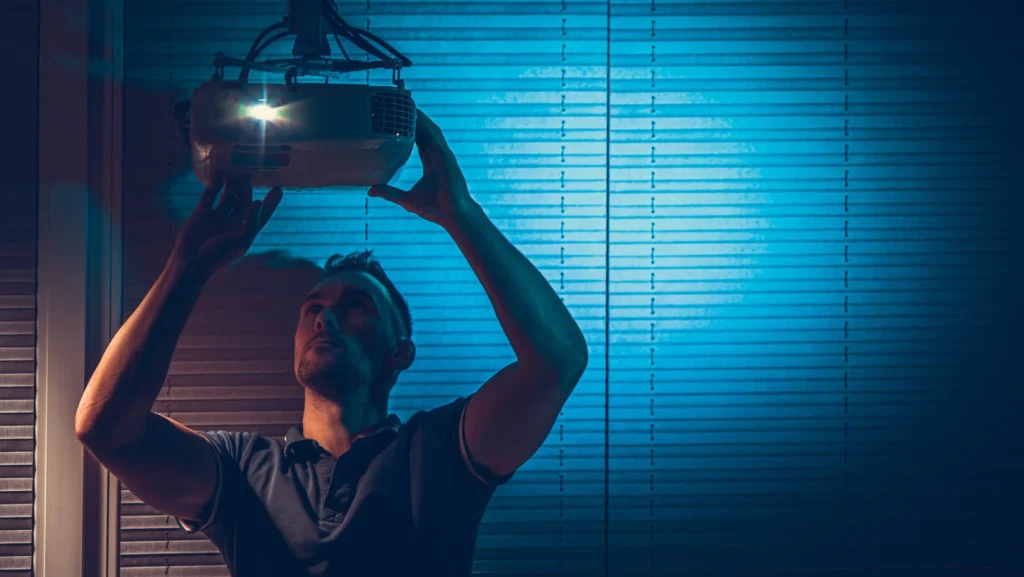
- Choose a Location: Select a suitable location for the projector that provides enough space and a clear line of sight to the projection surface. Consider factors such as ambient light, screen size, and accessibility to power outlets and audio sources.
- Connect Power: Plug the projector into a power outlet using the supplied power cable. Ensure the power source matches the projector’s voltage requirements to avoid damage.
- Connect Video Source: Depending on your setup, connect the video source to the projector using the appropriate cable. Common connection options include HDMI, VGA, DisplayPort, or USB-C cables. Ensure the cable is securely plugged into both the projector and the video source.
- Adjust Focus and Zoom: Adjust the projector’s focus and zoom settings to achieve a clear and sharp image on the projection surface. Use the projector’s manual focus and zoom controls or the remote control, if available, to make precise adjustments.
- Keystone Correction: If needed, use the projector’s keystone correction feature to adjust the shape of the projected image and correct any distortion caused by the projector’s angle relative to the screen.
- Select Input Source: Use the projector’s menu or remote control to select the correct input source corresponding to the video input you’ve connected (e.g., HDMI, VGA). This ensures the projector receives the video signal from the correct source.
- Adjust Screen Size and Position: Position the projector at the desired distance from the screen to achieve the desired image size. Use the projector’s lens shift, throw ratio, or screen size adjustment settings to adjust the image size and position accordingly.
- Test and Adjust Settings: Test the projected image and make any necessary adjustments to brightness, contrast, color temperature, and other image settings using the projector’s menu or remote control. Ensure the projected image is clear, bright, and properly aligned with the screen.
- Audio Setup: If your projector has built-in speakers or audio output ports, connect external speakers or audio devices as needed. Adjust the audio settings on the projector to ensure synchronized audio with the projected video.
- Secure Cables and Accessories: Secure all cables and accessories to prevent tripping hazards and ensure a tidy setup. Use cable management solutions or adhesive clips to keep cables organized and out of the way.
By following these steps, you can effectively connect and set up a projector for your desired projection needs, whether it’s for presentations, movies, gaming, or other multimedia applications.
Common Projection Applications
Projectors find applications in various settings and industries due to their versatility and ability to display large images.
Here are some common projection applications:
Business Presentations:
Projectors are frequently used in conference rooms, boardrooms, and meeting spaces for business presentations, slideshows, and multimedia content sharing. They provide a larger display size, making it easier for everyone in the room to see the content clearly.
Education and Training:
In educational institutions such as schools, colleges, and training centers, projectors are used to deliver lectures, presentations, and visual aids to students. Teachers and trainers use projectors to display educational videos, slideshows, diagrams, and interactive content.
Home Theater:
Projectors are popular for creating immersive home theater experiences, allowing users to enjoy movies, TV shows, and gaming on a large screen. Home theater projectors offer high-definition image quality and can be paired with surround sound systems for a cinematic experience.
Digital Signage:
Projectors are used for digital signage applications in retail stores, museums, airports, and other public spaces to display advertisements, information, directions, and promotional content on large screens or walls. They provide dynamic and attention-grabbing displays.
Events and Entertainment:
Projectors are commonly used for live events, concerts, stage productions, and outdoor screenings to display visuals, graphics, and video content to large audiences. They enhance the overall experience and engagement of the audience.
Gaming:
Gamers use projectors to play video games on a larger scale, creating an immersive gaming environment. Gaming projectors offer features such as high refresh rates, low input lag, and enhanced color reproduction to deliver a smooth and responsive gaming experience.
Art and Installations:
Artists and designers use projectors for creating large-scale art installations, projection mapping, and interactive displays. Projectors enable artists to showcase their work in unique and creative ways, transforming ordinary spaces into immersive environments.
Medical Imaging:
In medical facilities, projectors are used for medical imaging applications such as displaying X-rays, MRI scans, and medical presentations during conferences and training sessions. Medical-grade projectors offer high-resolution imaging and color accuracy for accurate diagnosis and analysis.
Outdoor Events and Mapping:
Projectors are used for outdoor events such as festivals, concerts, and public celebrations to create spectacular light shows, 3D mapping projections, and multimedia displays on buildings, landmarks, and natural landscapes.
Simulations and Virtual Reality:
Projectors are integrated into simulation systems and virtual reality setups for training, simulation, and gaming purposes. They create immersive virtual environments and scenarios for military training, flight simulation, architectural visualization, and more.
Maintenance and Care Tips for Projectors
Maintaining and caring for projectors is essential to ensure optimal performance and longevity.
Here are some maintenance and care tips for projectors:
- Regular Cleaning: Dust and dirt can accumulate on the projector lens, vents, and filters, affecting image quality and causing overheating. Use a soft, dry cloth or a projector-specific cleaning kit to gently clean the lens and exterior surfaces. Avoid using harsh chemicals or abrasive materials that could damage the projector.
- Air Filter Maintenance: Many projectors have air filters that prevent dust and debris from entering the internal components. Check the projector’s user manual for instructions on how to access and clean or replace the air filter regularly. A clogged air filter can restrict airflow and lead to overheating.
- Proper Ventilation: Ensure that the projector has adequate ventilation and airflow to prevent overheating. Place the projector in a well-ventilated area with sufficient space around it to allow air to circulate freely. Avoid placing the projector near heat sources or in direct sunlight, as excessive heat can damage internal components.
- Lamp Replacement: Projector lamps have a limited lifespan and will eventually need to be replaced. Keep track of the lamp usage hours and replace the lamp when it reaches the end of its lifespan or starts to dim. Follow the manufacturer’s recommendations for lamp replacement to ensure compatibility and proper installation.
- Transportation and Storage: When transporting the projector or storing it for an extended period, use a protective carrying case or bag to prevent damage. Secure any cables and accessories to avoid tangling or damage during transportation. Store the projector in a cool, dry place away from dust, moisture, and extreme temperatures.
- Update Firmware: Check for firmware updates and software patches for your projector regularly. Installing the latest updates can improve performance, add new features, and fix bugs or security vulnerabilities.
- Power Management: Turn off the projector properly using the power button or remote control after each use to avoid sudden power surges or damage to the lamp. Allow the projector to cool down before unplugging it or moving it to prevent internal components from overheating.
- Professional Maintenance: If you encounter any technical issues or problems with the projector, consult the user manual or contact the manufacturer’s customer support for assistance. Consider scheduling regular maintenance checks or servicing by a qualified technician to keep the projector in optimal condition.
Frequently Asked Questions About Understanding the Basics of Projectors: How Do They Work?
Q: How does a projector work?
A: Projectors work by displaying images or videos onto a screen or surface using light and optics. They typically consist of a light source, lens, imaging panel, and various optical components. The light source, often a lamp or LED, produces light that passes through the imaging panel, where the image or video is created. The lens then focuses and projects the image onto a surface, such as a screen or wall, for viewing.
Q: What types of projectors are available?
A: There are several types of projectors available, including LCD (Liquid Crystal Display), DLP (Digital Light Processing), and LCoS (Liquid Crystal on Silicon). Each type has its own set of advantages and disadvantages, such as image quality, brightness, and portability. Additionally, projectors can be categorized based on their intended use, such as home theater, business presentations, education, and gaming.
Q: What is the difference between resolution and aspect ratio?
A: Resolution refers to the number of pixels that make up an image displayed by the projector. It is typically expressed as the number of pixels horizontally by the number of pixels vertically (e.g., 1920×1080 for Full HD). The aspect ratio, on the other hand, is the ratio of the width to the height of the projected image. Common aspect ratios include 4:3 (standard), 16:9 (widescreen), and 16:10 (widescreen).
Q: How do I connect and set up a projector?
A: Connecting and setting up a projector involves connecting it to a video source, such as a laptop, DVD player, or streaming device, using the appropriate cables (HDMI, VGA, etc.). Once connected, adjust the projector’s focus, keystone correction, and other settings as needed to optimize the image quality. Finally, position the projector and screen or surface in the desired location for viewing.
Q: What are the key factors to consider when choosing a projector?
A: When choosing a projector, consider factors such as resolution, brightness (measured in lumens), throw distance, connectivity options, and intended use. Determine whether you need a portable projector for travel or a permanent installation for home theater or business presentations. Additionally, consider the environment where the projector will be used, such as ambient light conditions and available space.
Final Thoughts
Understanding the basics of projectors offers insight into the fascinating world of visual display technology. From their fundamental components to their diverse applications, projectors play a crucial role in various settings, including classrooms, boardrooms, home theaters, and entertainment venues. By grasping concepts such as resolution, aspect ratio, and projection technology, users can make informed decisions when selecting a projector that suits their needs.
Whether for business presentations, educational purposes, or immersive cinematic experiences, projectors continue to evolve, offering increasingly advanced features and capabilities. With this foundational knowledge, individuals can navigate the realm of projectors with confidence and enhance their viewing experiences in a multitude of environments.