

Do you need help with ways to mount a monitor without holes? Everyone wants the clean look of mounting a flat-screen or curved PC monitor on their wall, but sometimes the area has no pre-drilled holes for easy installation.
Fortunately, there is an easier way! In this article, we will guide you through our foolproof step-by-step method for easily mounting your favorite monitors – without any drills or worries. Read along, and let us show you how simple the process can be with our trustworthy techniques and tips.
Looking for a Way to Mount your Monitor without Having to Drill into your walls?
Our step-by-step guide covers all the basics of mounting your monitor so you don’t have to worry about damage. We provide easy-to-follow instructions on choosing the right brackets and equipment for the job and tips on ensuring everything is properly secured. Plus, we can help you save time and money by avoiding costly repairs.
With our no-holes mounting solution, you’ll enjoy using your monitor with its new location and improved ergonomic experience while preserving your home’s or workspace’s integrity.
Is it Possible to Mount a Monitor without Holes?
Yes, it is possible to mount a monitor without holes! This method is ideal for people who don’t want to damage their walls or do any drilling. A non-VESA-compatible monitor can also be mounted with this technique – as long as the monitor and bracket are properly secured.
The key to mounting a monitor without holes is using the right tools, and a VESA adapter kit is the perfect solution. These kits usually come with all the tools you need to mount your monitor without drilling any holes – Once connected, they either hold the monitor with their adjustable pads or get attached to the monitor’s stand.
Things Needed to Mount a Non-VESA Monitor
Older monitors do not come with VESA mounting holes, making it difficult to mount them.
However, purchasing an adapter kit that will give the monitor VESA compatibility is a cost-effective solution. These kits are specifically designed to turn non-VESA monitors into VESA-compatible ones.
So, let’s see what are the things needed to turn your non-VESA monitor into a VESA-compatible monitor:
1. Monitor Arm
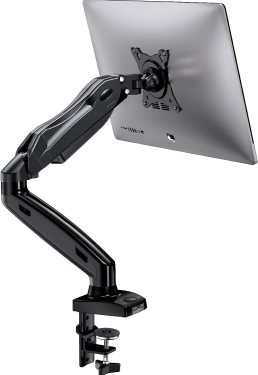
Monitor Arm is the first kit for mounting a computer monitor into the preferred position.
You can adjust the angle, orientation, and depth for optimal viewing angles and healthy posture. It is an essential tool for creating a healthy workspace and gaming station. This is also a necessary investment to make desks ergonomically balanced. So, this is a must-have tool for mounting your computer monitor.
- Best Monitor Arm: HUANUO Desk Mount, Ergotron Desk Mount
2. VESA Adapter Kit
The Second thing you need for mounting your monitor is a VESA Adapter Kit. This kit helps to connect the Monitor Arm to any non-VESA compatible monitor.
This kit enables the monitor to be easily mounted on a mounting tool.
Based on your monitor’s specifications and VESA types, there are two kinds of VESA adapter kits on the market which are:
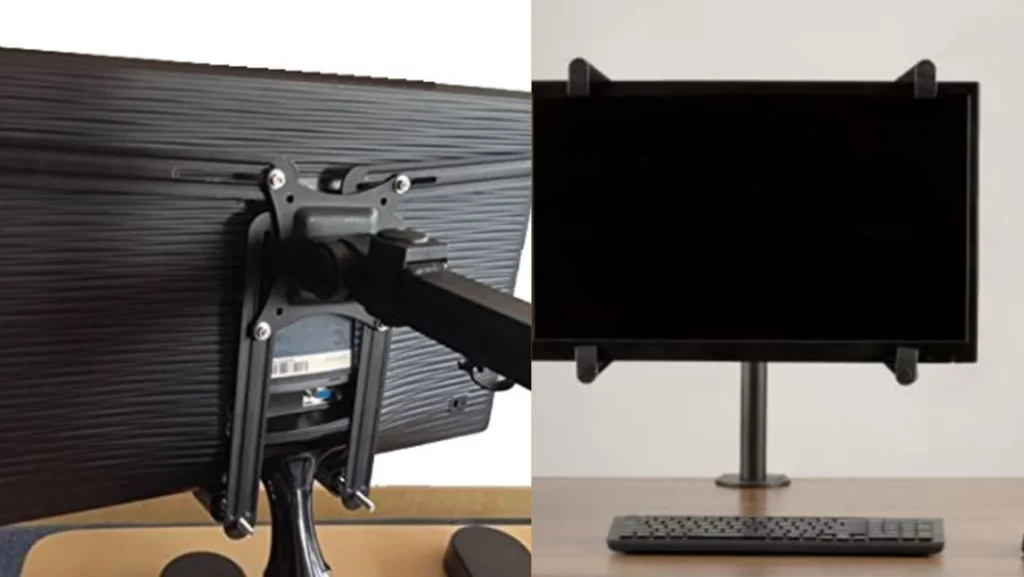
1. VESA Mount Adapter Plate
These VESA mount adapters typically come in two or four plates, with rubberized hands at the end to secure the monitor edges. You should Attach these plates to the mounting tool works as arms and holds the monitor edges in different positions.
It complies with all VESA standards, monitor sizes, and weight capacity. It is also less expensive than other mounting solutions and easily available online from stores like Amazon. So, this is a budget-friendly option for those looking to mount non-VESA monitors for an ergonomic setup.
- Best VESA Mount Adapter Plate: WALI VESA Mount Adapter
2. VESA Mount Adapter Bracket
This VESA mount adapter bracket is a square-shaped alternative to the VESA adapter plate with arms. The bracket fits in place of the monitor’s stand and attaches to the mounting tool. It also supports all VESA standards and comes for most branded monitor models (except Apple Mac).
The Adapter brackets are available at pocket-friendly prices from online stores and can be easily installed.
- Best VESA Mount Adapter Bracket: HumanCentric VESA Mount Adapter Bracket
Factors to Consider in a VESA Adapter Kit: Simple Guide

There are some key factors to consider when selecting a VESA adapter kit. A wide range of VESA adopter kits on the market can make it difficult to find the right one.
Here is a simple guide that will help you choose the best VESA adapter kit for your monitor:
- Ensure compatibility between the VESA standards of the adapter kit and mounting arm.
- Consider monitor size when choosing an adapter kit.
- Check specifications to ensure that the adapter can support the monitor’s weight.
- Verify that the VESA plate adapter is compatible with the thickness and bezel height of the monitor.
Mounting a Monitor without Holes: Steps to Follow
Once you’ve purchased the mounting arm and VESA mount adapter kit, you can mount your monitor without drilling holes.
Below is a step-by-step guide on how to mount your monitor without using any drills:
A) Mounting the Monitor with a VESA Plate Adapter
First, see how non-VESA monitor screens can be attached to a monitor arm using a VESA plate adapter.
1. Remove the Monitor’s Standard Stand
- Disconnect the monitor from its power source.
- Remove the stand from the monitor.
- Look up instructions or watch tutorials online if needed for assistance.
2. Connect the VESA Plate Adapter to the Mount
- Remove the monitor stand.
- Attach VESA adapter plates to the monitor arm with adjustable clamps.
- Place anti-slip rubber pads on the ends of VESA plates.
3. Attach the Monitor to the Adapter Kit
- Attach the VESA adapter to the mounting tool.
- Adjust the top and bottom adjustable pad length according to the size of your monitor.
- Fit the monitor in between the pads.
- The final step is complete.
This is how to mount a monitor without holes on a budget using a VESA plate adapter kit.
B) Mounting the Monitor with a VESA Bracket Adapter
Let’s see how to mount a non-VESA-compliant monitor to the mounting kit using the VESA bracket adapter.
1. Remove the Monitor’s Standard Stand
- First, remove your computer monitor’s stand just as you did in step 1 for the VESA plate adapter kit.
2. Install the VESA Adapter Bracket
• Removed monitor stand.
• Install a VESA bracket adapter to the monitor screen.
• Fit by tightening screws where the monitor stand was previously attached.
3. Connect the Bracket Adapter with the Mount
• Adapter kit attached in place of the monitor stand.
• Connect the VESA bracket adapter to the monitor arm with the mounting tool.
• Tighten all screws through the VESA holes of both kits.
Congratulations! You’ve successfully mounted your non-VESA monitor without holes.
How to Mount a Monitor without Holes: Video Tutorial
Watch this video tutorial for a quick resolution and learn to mount your non-VESA monitor to a mounting arm.
Mounting a Non-VESA Monitor: Some Easy DIY
VESA adapter kits are most compatible with branded monitors like DEL, HP, Acer, MSI, Samsung, etc. If you have another local brand of computer monitors, it might be hard to find VESA adapter kits for them.
You can try some easy DIY solutions to mount your non-VESA monitor without drilling holes in such cases.
Let’s have a look at some of these:
- Four VESA holes can be made in the back panel of a computer monitor by drilling to determine millimeter distances accurately.
- The VESA plate of the monitor arm can be fixed by gluing or taping it to the back of the monitor, allowing for easy mounting.
A downside to self-installation is that drilling could damage sleek designs internally, and permanently affixed plates are hard to remove.
Appropriate Precautions While Installing
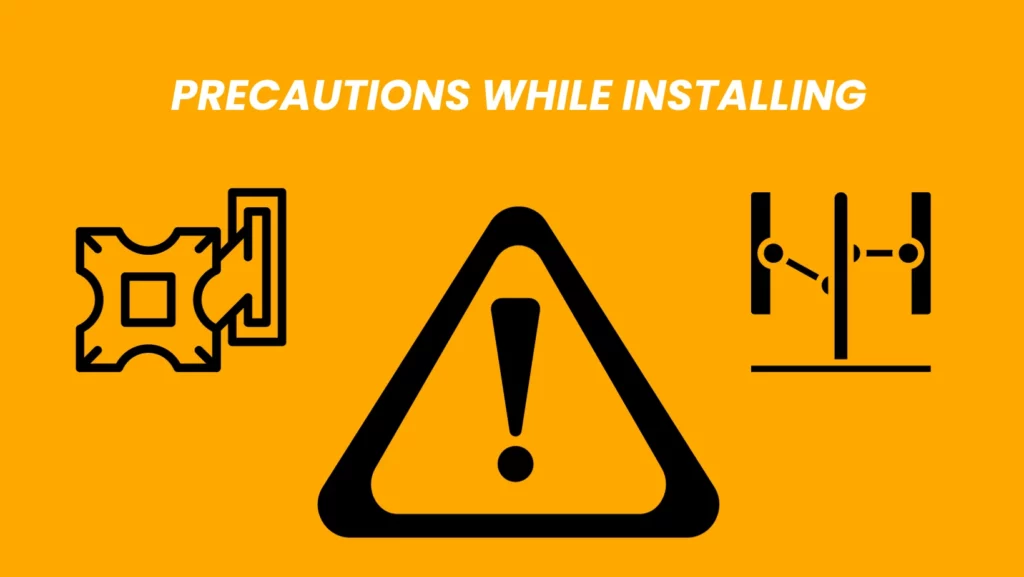
It is important to remember that not all monitors are eligible for a VESA mount, and each has its own set of limitations.
Ensure compliance with your monitor’s specifications for safety: Too much stress can cause the monitor to break. Always consult user manuals or references like the manufacturer’s website before proceeding. Also, use appropriate tools and exercise caution while drilling holes in the monitor.
You also have to be aware of the following:
- With a VESA plate adapter, care should be taken not to over-tighten the screws.
- Potential damage can occur if the adapter screws are tightened too much.
- Using a monitor mounted via the adapter kit in a vertical orientation is not recommended, as it could slip off the adapter and become damaged.
Frequently Asked Questions About Mounting A Monitor Without Holes: Step-by-Step Guide
Q: What is a VESA mount adapter kit?
A: A VESA mount adapter kit is designed to allow monitors without the standard four-hole mounting pattern required for VESA wall and monitor arm mounts. The adapter lets you easily attach your non-VESA monitor to a mounting tool or stand.
Q: How do I know if my monitor is VESA-compliant?
A: Most monitor manufacturers provide the exact model number of their monitors in an online search. The model number should include details on whether the monitor is VESA-compliant. If you don’t find any details, consult the manual or contact customer service for more information.
Q: Are all mounting arms compatible with all VESA mounting kits?
A: Not necessarily. Check the specifications and compatibility of your monitor arm and VESA mount adapter before buying them. Ensure that they are designed to support each other’s capabilities.
Q: Can a monitor be mounted without drilling holes in its back panel?
A: It is possible to mount a monitor without holes using a VESA adapter plate or bracket. These kits can be easily attached and used in place of the standard stand with your monitor.
Conclusion
There you have it – all the information you need to mount a monitor without drilling holes. With the right tools and supplies, mounting a monitor with a monitor arm is surprisingly straightforward and stress-free. You don’t have to worry about drilling or modifying your wall because these arms are attachable without causing any damage. And if you choose an adjustable mount, your monitor can be adjusted according to your needs. The possibilities are endless!
Now that you’re equipped with this knowledge head over to our Monitor Arms Guide for more information about our wide selection of wall-mounted and desk mounts, and get started on mounting your new monitor.